Are you looking to Upgrade Mirage and move it to a new server, or are you just looking to move Horizon Mirage to a new server, this article will describe what you need to do.
Requirements
This guide is NOT a step by step guide, and will not take you through all the step with screenshots, but will give a walk through of what needs to be done to upgrade Mirage and change the Windows Server to another server, or just move it to a new server without upgrading. The obvious reason would be to upgrade from Windows 2008 to 2012. This guide will require you to have knowledge about vSphere, Microsoft SQL, Windows i general, and also Horizon Mirage.
You have to have a separate data disk with your mirage data to use this guide, or you will have to hand pick data from the disk where it lies. I will only describe what you need on the data disk for this to work.
I will be upgrading from Horizon Mirage 5.3 to 5.8.1, and will be moving from Windows Server 2008 R2 to Windows Server 2012 R2.
Road to success
We will be going through the following steps:
- Backup (VM, OS, SQL, Data, Certificates)
- Modify Old server
- Prepare new server
- Install Mirage
- Mirage Clean Up
- Install Second Management Server
Backup Backup Backup
First thing you need to do is backup. I will not guarantee that following this guide will not get you in trouble, so it is at all time, your own responsibility what you do, and also how to restore everything to its original state if things go south. Apply common sense.
So the first thing you need to do is make a backup of everything. Don’t forget you SQL server, if it is a separate server.
I have daily snapshot backups, which does not include the data disk, so I will be relaying on VM backup for the Operating System, and also disk snapshots for the data disk, SQL backup for the databases and a steady hand for the process.
Also you might want to export your Web Server certificate from your certificates store in windows if you are running Mirage over SSL, which you should be.
Remember to shut down the Mirage services before you take the backup, so that the database will be is a consistent state.
Also it is a good idea to check if you know the local administrator password, or maybe change it to something you do know, since we will be deleting the old servers domain computer account.
You can find a little inspiration for backup here: https://kb.vmware.com/kb/2031711
You might want to make a note of your SQL DB and account, and the Mirage Cache Size like described in the article above.
Modify Old Server
This step includes:
- Shutdown Old Server
- Disconnect Nic
- Unattach data disk
- Rename server i vCenter
- Delete Computer Account in Active Directory
Provided that you moved the backup data away from the server, or it is on your separate data disk, it is time to shutdown the old server. After it has been shutdown, you may disable its network adapter to avoid trouble if someone accidentally powers it on again. Also make a note of its data disk location, and remove it from the VM, without deleting it.
Rename your VM in vCenter to be able to deply the new server with the same name.
Now delete the old servers computer account from Active Directory since, we are going to give the new server the same name, and join it to AD. It goes without saying that doing this will prohibit the old server from talking to AD. If you need to roll back you should be able to just rejoin AD.
Prepare new server
This step includes:
- Deploy VM
- Set IP
- Join AD Domain
- Add Virtual Disk
- Install .NET 3.5 Feature
- Install SQL Express
- Windows Update
- Attach disk
- Snapshot VM
- Restore Mirage DB
- Restore Certificate
Deploy VM
Now deploy your new Windows server with the same name. During deployment I will be setting a static IP address, and also joining the server to my domain, and adjusting Hardware to specification which can be found in the documentation on page 15.
After deployment check that your server has got the right name. If you are to quick it might have gotten a “-0” behind it name, and you should correct that before proceeding.
Now install the .NET 3.5 feature in Windows.
SQL Express Install
I chose to add a second 10 GB disk, to a second VMware Paravirtual Controller as target 1, (SCSI 1:1) at this point. I will later be adding the data disk as target zero on that controller (SCSI 1:0).
I will be calling the new disk E: and this will be used for SQL Databases. I had SQL DB’s on D: on the old server, and I want the old data disk to be D: on the new server.
This is not a high performance SQL server, if it was we should not be using SQL Express, so I will not be segmenting my DB’s from my Logs. This installation is not very big, only around 100 CVD’s, if yours differ you can install SQL however you like.
Download and install SQL Express on the server along with SQL Studio Management. I used SQL Express 2012.
During SQL installation I will be pointing my databases to: E:. For other details about SQL install check the documentation.
After SQL Installation and a Reboot, Run Windows Update to get everything patched. I have set Windows Update to also handle other Microsoft Updates, so it will update SQL Express.
Restore Mirage DB
After Windows Update is done and the server is rebooted , I shutdown the server to attach the Data disk to the new server. After this I take a snapshot of the VM, to be able to roll back in case something goes wrong.
I power up the server an bring the data disk online as D:.
Now you can restore the database from backup on the new server.
Restore Certificate
It is time to import your SSL Certificate, or issue a new one if you choose to. Remember that your private key needs to be exportable.
Mirage Install
This step includes:
- Create a Service Account
- Install Mirage Management Server
- Install Mirage Server
- Install Mirage Management Console
- Install Mirage Web Management
- Install Mirage Web Access
Create a Service Account
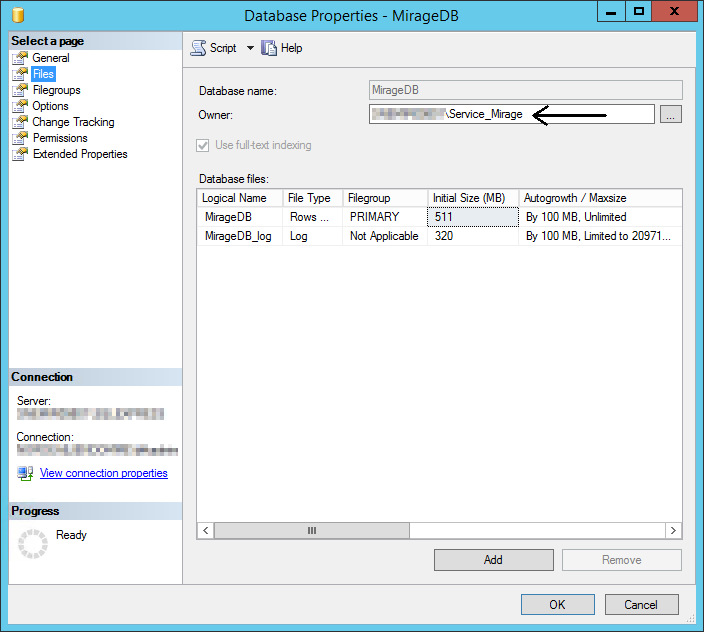
First you need to create a service account for Mirage. It has to be a domain account, otherwise it will not be able to work with domain users. You need to add it to the local administrators group, and also add it to SQL. I called mine Service_Mirage.
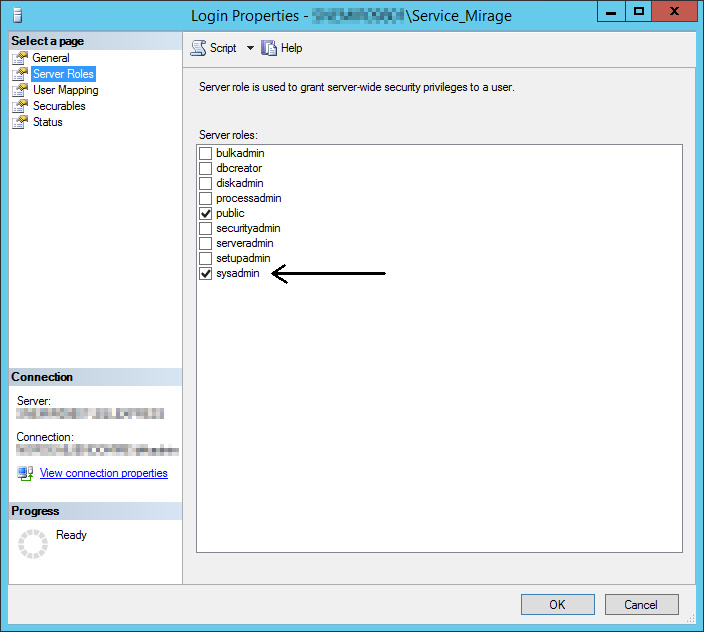
Give the account sysadmin role in SQL
Make the account Owner of your restore database
Install Mirage Management Server
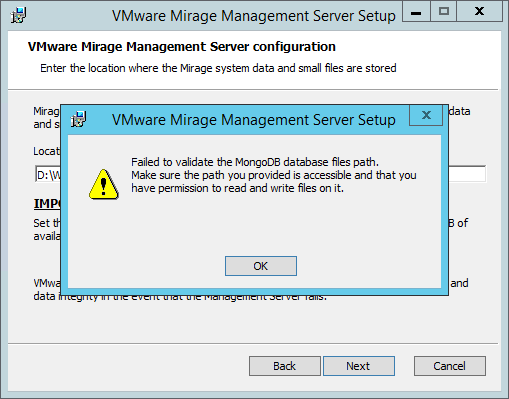
Run the installer for Mirage Management Server. During installation DO NOT SELECT Create new storage areas.
I will be installing the MongoDB to D:\Wanova Mirage\
If you get the error: “Failed to validate the MongoDB database files path. Make sure the path you provided is accessible and that your have permissions to read and write files on it.”
You might want to either disable User Access Control and reboot the server, or run the setup with the build-in local administrator account.
If you get the error: “Quiet exec failed: Failed setting default server policies: default minimal set.” You need to give your account DB owner rights on you restored database, and also give it sysadmin rights on SQL during the upgrade. I have seen this happen if you use the System Account for the service. Try using a domain service account.
Reference: https://communities.vmware.com/thread/489996?start=0&tstart=0

Install Mirage Server
Run the Mirage Server Install executable. During installation, you should NOT select to Create a new local cache area. You need to select where on the data disk your local cache is located, and select the correct size of your local cache. Mine is located in: D:\Wanova Mirage\LocalCache
For clients to be able to speak to you Mirage server. You have to open port 8000 in you local Windows firewall.
Reboot after installation
Install Mirage Management Console
This is just a next next finish installation.
Install Mirage Web Management
There are things that you cannot do in the MMC Console, so we need the Web Management. A requirement for the Web Console is IIS, so go to server manager and install Web Server (IIS). You need some extra features, so check the documentation page 30.
The installation itself is just next next finish, but you again have to run it as local Administrator if you have UAC enabled.
Install Mirage WebAccess
Run the install again as administrator. The installation is next next finish.
In case you are wondering, the File portal URLs are: http://fqdn:6080/Explorer for the users and http://fqdn:6080/AdminExplorer for the Admins. If you want to give users access you have allow the port in your Windows firewall.
You might get an error saying “Failed to enable file portal on VMware Mirage Management Server, manual configuration is required. The install process will continue” That means that you will have to set the URL to the file portal yourself in the management console.
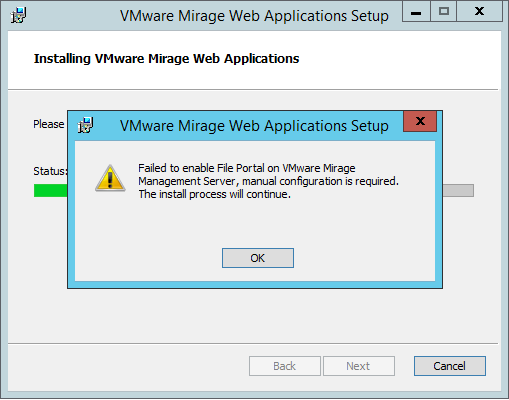
Right click on System Configuration and Select Setting. Set the Portal URL, and click OK.

After installation I recommend replacing the Self Signed certificate VMware made for Mirage portals in IIS to you PKI issued web certificate, that is easily done on bindings for each site in IIS.
Mirage Clean Up
This step includes:
- Remove Old Server
- Import USMT
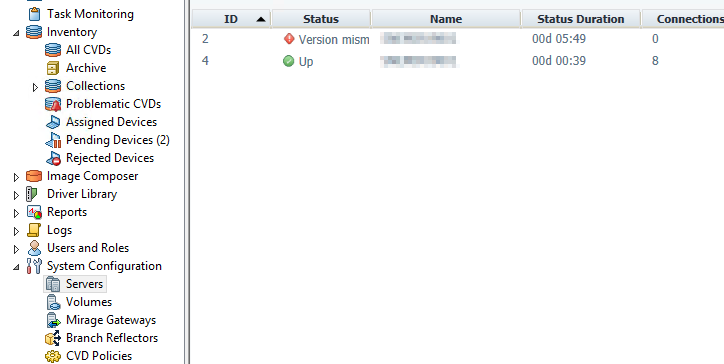
The old server will be listed in the servers view in the Mirage Management Console, you need to remove it manually.
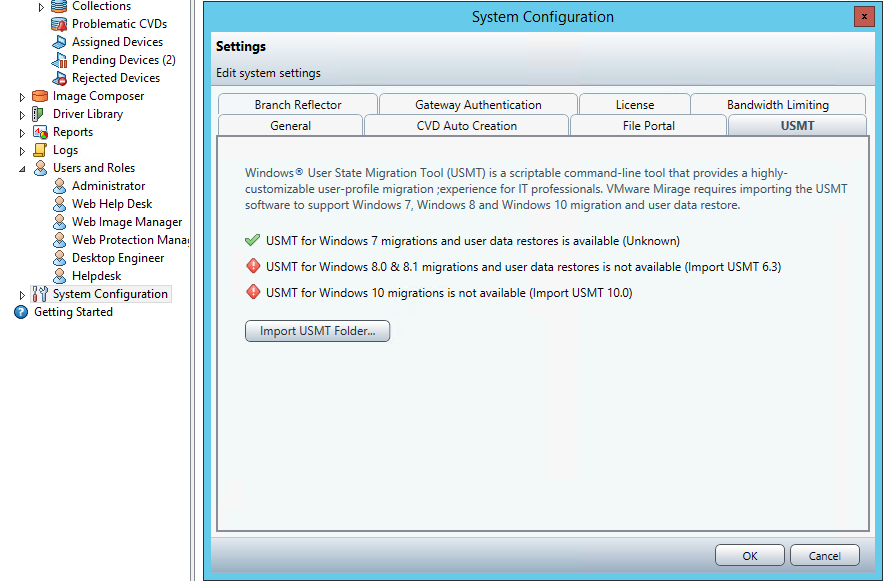
Also your USMT tools will be missing, so install those on the new server. You need to download the Windows ADK for Windows 10, and for Windows 8.1. You do not have to install it on the server, you can just install it somewhere else and copy the USMT catalogs to a place where your mirage server can import them from.
Time to remove the old server from database. Just right click it and remove.
You may have to right click the new server in the list and start service afterwards.
If you cannot log into the Mirage Management Console, but get a Error: “Access Denied.” Try logging in with your service account to Windows, and then test again. The most likely reason is that you used a local service account insted of an AD integrated one.
Install Second Management Server
This step includes:
- Deploy VM
- Add new data disk
- Open SQL Communication
- Change Windows Firewall Settings
- Change your Mirage Volume Path
- Install .NET 3.5
- Windows Update
- Install Mirage Management Server
Deploy a new Windows VM and add it to AD. Add a disk at at least 251 GB, I made mine thin-provisioned. If you have a large installation read the documentation, then you might need more space. I added the disk to a second VMware Paravirtual controller. Partitioned and formatted the disk.
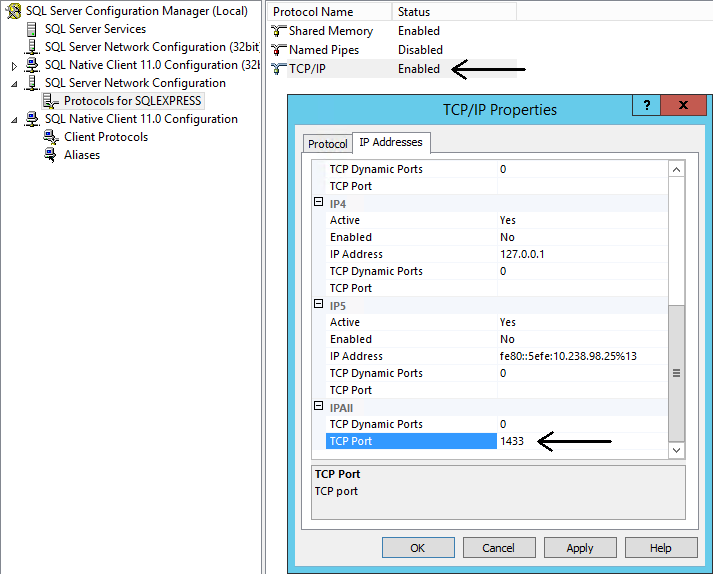
Enable SQL to communicate using TCP/IP on the first server. This is done in the SQL Server Configuration Manager
You have to make some adjustments to your Windows firewalls for this to work. Make the following port openings:
First Server -> Second Server Port 27017 – This is for MongoDB Communication
Second Server -> First Server Port 1433 – This is for SQL Communication
Second Server -> First Server Port 27017,27018 – This is for MongoDB Communication
Any -> First Server Allow NBT Traffic (See the picture)

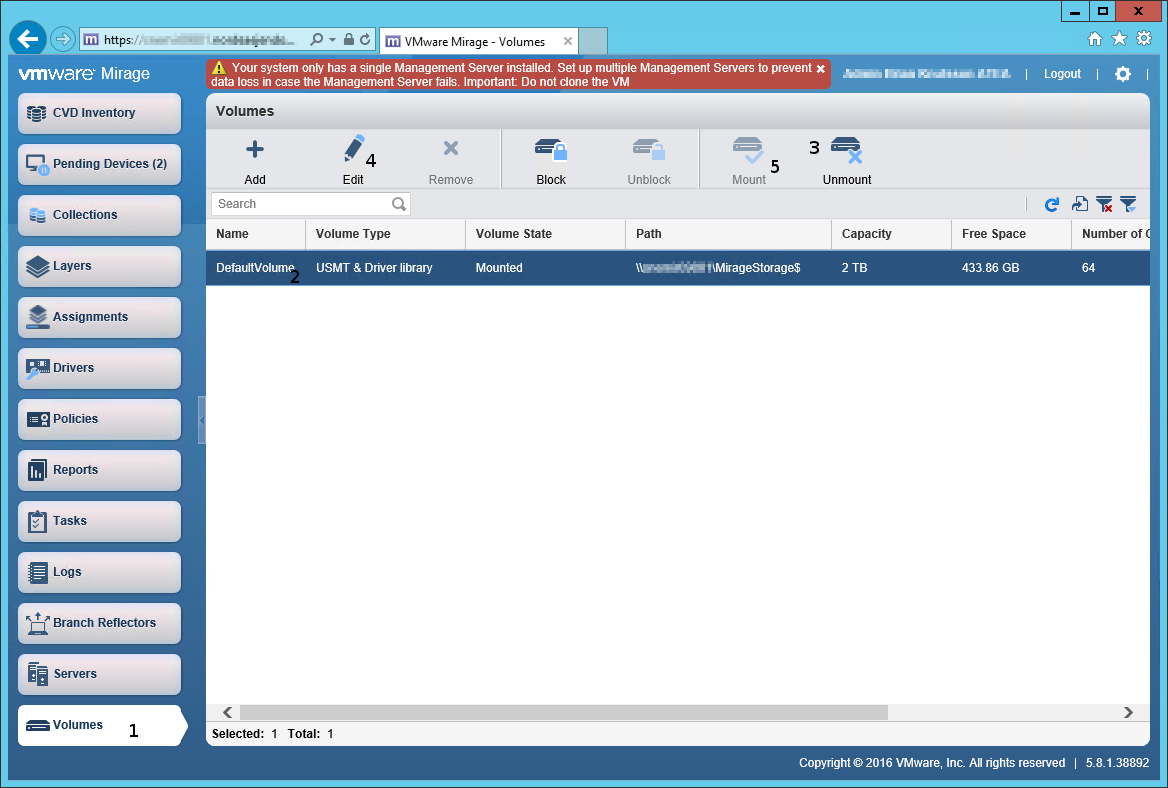
Before we begin with the installation, we have to check if our Mirage Storage is defined by a UNC path, this is a requirement for the second server to be able to locate the data. So go and share your MirageStorage folder. I made mine a dollar-share (ie. \\servername\MirageStorage$) Make sure to use the Advanced Sharing or else Windows will begin to rewrite file security settings, which can take a LOOOOOOOOONG time on that folder. If that happens by accident, just let i finish. Come back later. I set the sharing rights to READ/WRITE for my service account only.
To change you path, login to the Web Console and do the following:
- Make sure that you are not running any task
- Unmount Volume
- Edit Volume
- Change Path to UNC (\\servername\MirageStorage$)
- Mount Volume
Next go and install the .NET 3.5 feature in Windows on your second server.
Run Windows Update, and reboot your server.
We are now ready to install.
Start the Horizon Mirage Management Server installation on your second server the same way you did the first. When asked about database make sure NOT to select Create new storage areas. In SQL server name, type the name of the first server. Second you have to give a path for the MongoDB files, I choose the same path: D:\Wanova Mirage\.
Next you enter the Domain Service Account that you created earlier. The rest is next next finish.
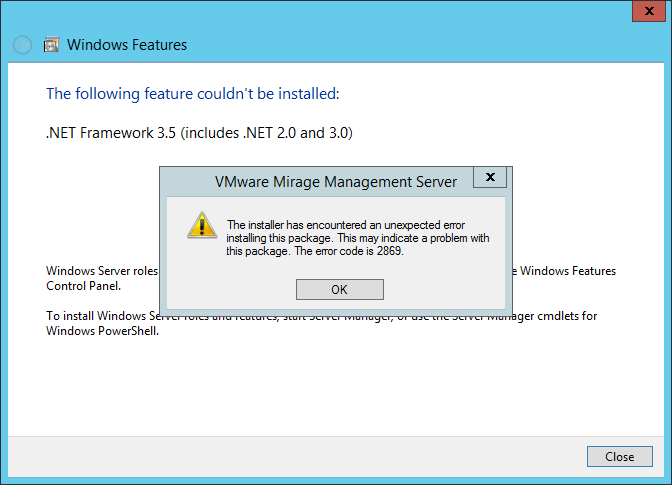
If you get this error: “The installer encountered an unexpected error installing this package. This may indicate a problem with this package. The rror code is 2869.” Then you forgot to install .NET 3.5 feature.
You can install the console on the second server if you want to, but in my setup the first server is single point of failure anyway, so I will not bother. You are now done, and have successfully moved you mirage installation to a new updated platform.
I hope that you found this useful. The guide turned out to be MUCH longer than I expected when I started.
If the MongoDB service cannot start on your second server, and it fails when you try to start it through the Web Management Console, it is likely because you forgot the firewall openings.
You might want to end by Windows updating both servers.
Also remember to remove your snapshots when you have confirmed that everything is working. They can grow really large fast.
One thought on “Upgrade VMware Horizon Mirage to new server”